Bytes

Building a podcast studio at home
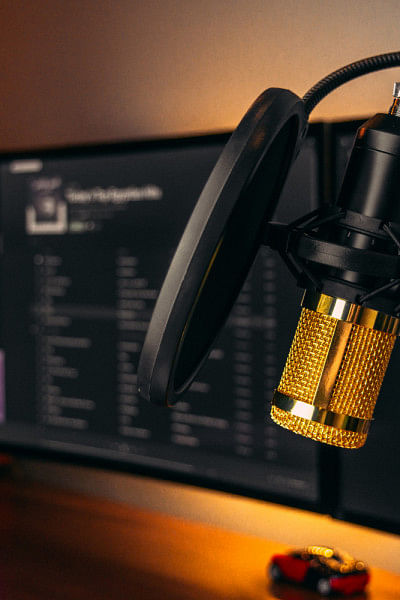
Podcasting studios are your home base. This is where your ideas come to life, where your episodes come to life, where your ideas become content that goes viral. In other words, if you’re serious about your podcast, you’ll need a decent setup. How important is it to have a good recording studio? A good performance is crucial to the success of your show. A state-of-the-art studio with tens of thousands of dollars of podcasting gear isn’t necessary to produce high-quality audio. If you’re just starting out, your podcast needs are simpler than if you’ve got those setups. Despite the importance of a good podcast studio setup, we don’t recommend waiting until you have the time and money to build one. The sooner you record the episodes, the better. The sooner you learn what makes a great episode, the sooner your fan base will start growing.

Step 1: Choose the right space

The first step is to choose the right podcasting space. It is most likely that the location of your podcast studio will have the greatest impact on the sound quality of your audio. If you cannot build your own recording space from scratch, a room in your house will do. Make sure you have a lot of soft surfaces, like carpeting, rugs, and fabric furniture. You should stay away from rooms with hard surfaces, such as your kitchen or the living room.  It is also important to pick a space that is not affected by external noise like rooms on the other side of the street or rooms that do not share walls with common areas of your house. It is often great to have a finished basement without sharing walls with other rooms.  Despite popular belief, many podcasters record in their closets. It is often easier to get clear audio in small, soft spaces without echoes when there is lots of soft material.

Step 2: Soundproof your podcast studio setup

Next, to add sound treatment, you need to choose a good location. Your recordings will sound better with every step you take to improve their quality. This will save you time later editing the imperfections. The best solution is to use soundproof foam panels. Sound absorbers are used to prevent sound from bouncing around a room or hitting your microphone. You can attach them to blank walls, cabinet faces, or even the ceiling.

Step 3: Grab your recording equipment

A podcast studio setup would not be complete without a few pieces of podcast equipment. However, the amount you buy is entirely up to you. The sound quality on your laptop microphone might not be ideal, but technically you could record episodes with it. We recommend that you grab a few pieces of gear to save you time and hassle when editing your episodes.

Computer

You'll need a computer to run the software that records and edits your episodes. You'll also need it to upload your episodes, write show notes, and market your podcast.

XLR or USB microphone

Your microphone is the most important part of your podcast studio setup. It has the greatest impact on the quality of your audio. A good condenser microphone will save you a lot of time during post-production. An XLR mic and USB microphones each have their advantages and disadvantages.

Mixer

A mixer will improve your audio quality and offer multi-channel recording horse shows with guests or co-hosts. This isn't a required piece of equipment (unless you use an XLR microphone), but it makes amazing audio. Choose one with multiple channels and an AUX-out feature.

Audio Interface

Not all computers have an audio-in port these days. Macs, for example, have not had it for quite some time. To record audio to your computer, connect your mics, and other gear, you will need to use a dedicated audio interface.

Pop filter or windscreen

Good microphones tend to make the plosives in our speech (Ps, Ts, Ks, etc.) stand out, so you need a pop filter to soften those hard bursts of air. These are not expensive, but they make your audio more pleasing.

Headphones

Rather than hearing yourself in the room, you hear what the microphone hears with headphones. In this way, you can control the volume and tone of your recording. Improved records equal less editing (and better records = better records). While you can use any headphones, sets that completely cover your ears (instead of earbuds) are more effective.

Microphone stand

A mic stand or boom mount gets the mic up off the desk and closer to your mouth. This is important because the vertical alignment impacts the sound of your voice. A stand also lessens that chance that you'll bang or rub something against the mic during recording.

Acoustic treatments

Some podcasters work cheaply by covering themselves with a blanket while they record. This technically works, but it gets old fast. Eventually, you'll want to pick up some acoustic treatment pieces that function well and look great in your room.

Step 4: Pick your podcast editing software

Even though it may not be enjoyable to edit their episodes, it's a crucial step in producing good audio. As a podcast studio setup, editing software will come in handy for setting volume levels, removing background noise, and adding intros, outros, and ads. In addition to being free, Audacity has a variety of podcast tools, licensed music, effects, and other features. It's worth the cost because you get all of those effects and features in one tool.

Now you know exactly what you'll need to put together your own podcasting studio. Whether you're planning to spend a few hundred dollars or a few thousand, every penny counts. You'll have a great sounding podcast regardless of your budget. Here's a little secret. Some of the best sounding podcasts out there use much of the more affordable gear featured in this post. The real trick is in good recording and mix-down techniques.

Comments

চাঁদপুর, মেঘনা নদী, মরদেহ, নৌ-পুলিশ,

মেঘনায় লঞ্চ থেকে ৫ মরদেহ উদ্ধার

চাঁদপুর নৌ পুলিশের বরাত দিয়ে জেলা প্রশাসক বলেন, ‘ওই লঞ্চে পাঁচজন মৃত ও তিনজনকে আহত অবস্থায় পাওয়া গেছে।’

৪৪ মিনিট আগে