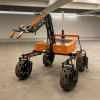
How to make your own Mars rover

Space exploration has always been a big fascination for mankind. Ask anyone, and they probably have wanted at some point to explore the Moon or our closest planetary neighbour, Mars. Building a Mars rover may seem like a daunting, or even impossible, task to many, but with the right knowledge of basic engineering principles and suitable materials, you can even try to make your own Mars rover at home! While there are different approaches to making a DIY Mars rover, there are some common steps towards successfully building one. Read on to find out how you can make your own Mars rover.

3D designing your rover
The 3D model design of the rover depends on what the rover will be used for. Since they are aimed to be able to run on Mars, it is essential to consider mobility when designing your rover. So, a solid suspension system should be included in the design. This should include technical specifications such as critical dimensions in width, length, height, the distance between the wheels, rocker-bogie suspension, etc.
"If you are looking to make a lightweight Mars rover, 3D printing will enable you to make highly complicated components easily," says Mir Tanzid Ahmed, Administrator of Team Atlas, an independent award-winning rover team. It is also essential to keep in mind how the electrical aspect of the rover will operate so that there is enough space for the PCB boards and wiring throughout the rover. It is normal to go through several iterations of rover design to get the right one.
Gather materials
The specific material you need will depend on your design and the functionality you aim for. Generally, some materials you will need include a chassis or frame to hold the rover's components — motors for traversal and wheels or tracks for mobility. You will also need a power source, such as batteries or solar panels and electronic components like microcontrollers and sensors. You will also need tools such as soldering iron, wire cutters and a drill. Building a robust rover according to a set design takes a long time.
"Some advanced components such as depth sensors or AI-based microcomputers may be unavailable locally, so you might need to source them ahead of time from overseas," shares Khondker Shihabul Hoque, former team leader of BUET Mars Rover Team - Interplanetar. According to Tanzid, it is best to do some initial market research before buying the materials to ensure that you can get better value and quality.
Assemble the rover
It is best to start assembling your Mars rover by installing your chassis in the frame. Once the top and bottom frames are ready, matching the 3D design, you need to insert the rocker-bogie suspension. The wheel joints need to be synced with the suspension as well. Once the body is ready, you need to install the electronic components, such as the microcontroller, sensors and any other devices you want to include. When assembling the camera unit, it needs to be placed at a location that works effectively, such as the front corner of the chassis.
"Assembling the rover is the most physically demanding job. It requires several iterations of modelling, assembling and testing cycle to get a working Mars rover finally," shared Alif Arshad, Senior Member of IUT Mars Rover - Team Avijatrik. Thus, be prepared to go through a lot of trial and error in this crucial step - and of course, don't give up if you fail the first few times. Feel free to take time assembling to ensure it goes right.

Testing and calibration
The rover's mobility can be tested by moving it around and ensuring that the wheels or tracks function correctly. Also, the sensors and electronic components should be tested by sending signals to them and providing they respond correctly. During this stage, you should also calibrate the sensors, including the cameras, if you have any. This ensures that they provide accurate data and that the rover can navigate and avoid obstacles. It is necessary to confirm that your Mars rover is functional with its controlling modules such as the Arduino Uno or MEGA board.
Shihabul suggests testing the current handling capability of the motor driver, as otherwise, your rover may stop working while traversing steep slopes of rough terrain. Tanzid recommends using a suitable RC receiver that receives the commands and sends them to an Arduino board. According to him, the sensors' functionality should be double-checked.
Fine-tuning and customisation
Once the rover works correctly, you can begin to fine-tune it and add any customisations you like. This can include painting the rover, adding additional sensors or even programming the rover to perform specific tasks. You can also add any scientific instruments, such as a weather station, a drill or a spectrometer to make your rover perform specific missions. You can add other features, such as an arm to collect samples or a robotic manipulator to perform tasks. Alif suggests experimenting reasonably with the Mars rover. He adds, "You can try implementing the engineering principles and your imaginations on your rover while customising."

 For all latest news, follow The Daily Star's Google News channel.


Comments