
A (shoe) box full of magic

What if I told you that the box can be as exciting as new shoes that come in it?
Faux cane basket
Starting with the easier, you can craft a faux cane basket with a shoebox, some jute twine and of course the always reliable hot glue. Begin by neatly cutting off the flaps at the top of the shoebox. It is best to paint the exterior of the box in a jute-like beige colour with acrylics but you can skip this step if short on time. Heat up that glue gun and start gluing from the bottom in straight lines. Now take that jute twine rope and place it on the glue securely. Continue wrapping the entire box with the twine and seal the last bit with some excess glue. If you want an upgrade to what is already an awesome faux cane basket, find an old white pillow case and make 3 small folds of about 3 inches from inside out. Then, place the folded region over the top edges of box and place the rest of the pillow case inside the box, securing the corners with some glue.
 For all latest news, follow The Daily Star's Google News channel.
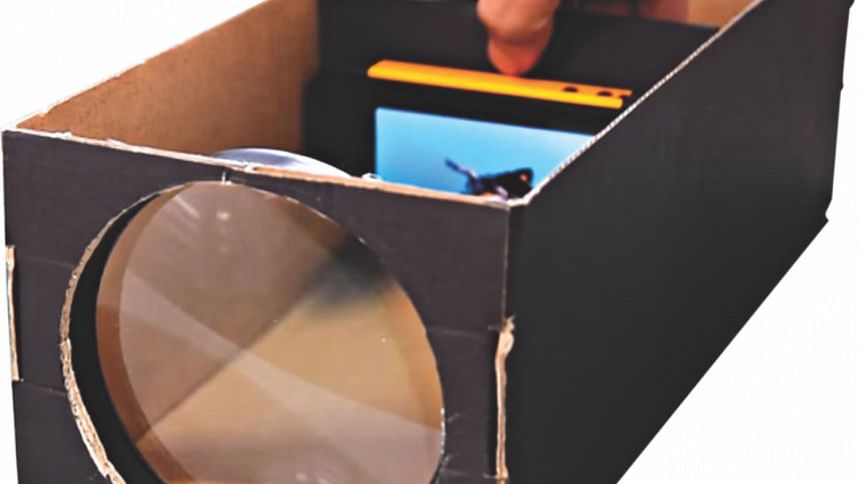
Projector
Imagine this: you really, really have to watch this movie you've been waiting for since forever but your laptop decided to flatline precisely on that weekend. There happens to be a solution to this nightmare: a smartphone projector. Besides, how cool would you be if you could turn a humble shoebox into a projector? Start by painting the shoebox pitch black inside and out, using multiple coats if necessary. Next, you'll need the lens for the projection which comes from a magnifying glass. Since the glass has to be separated from the handle, try to find the kind which has a detachable handle usually found in stationery shops. Trace the outline of the lens onto one of the smaller sides of the box and cut the circle out. Now place your lens in place, securing with electric tape or hot glue.
Next, you have to make the stand for your phone. It's as simple as hot gluing two pieces of foam board/cardboard perpendicularly, one of the pieces being of the same height and width as the inside of your box while the other being half the height. The larger piece should be attached to the centre of the smaller piece. While the glue dries, hold the boards in place with that triangular ruler from your geometry box that you never used. When done, attach sticky tacks to the back of your phone and place firmly onto the centre of the stand. Remember to put your phone on full brightness and maximum volume. However, note that the image passing through the lens gets inverted. So, when positioning the phone on the stand, place it such that the image is upside down, facing the lens and lock screen rotation. Move the stand back and forth to calibrate the focus using a white wall as your screen. As reinforcements for the phone you will need a speaker, preferably wireless, and a power supply, preferably a power bank. When everything is set and in place, grab a bag of chips, hit the lights and enjoy!
Labiba Mustabina is a biochemist in the making. A tree hugger, she also claims to be a closet artist. You can reach her at [email protected].


Comments